Homemade kimchi
Posted: March 13, 2013 Filed under: Recipes, Wellness | Tags: Healthy, kelly schreuder, kimchi, korean, recipes, Wellness Leave a commentI’m often amused at how the world works. A few weeks ago I tweeted, asking where I could find kimchi in Cape Town. I first tasted the Korean vegetable dish at Tokara last year. It had the most incredible tarty, pickled sweet taste and complimented the meat perfectly.
My kimchi prayer was answered when Kelly Schreuder, a Cape Town dietician replied to my tweet and offered to make me some! I was so touched by Kelly’s gesture that I asked her if she would consider doing a guest post. To my delight she obliged. We met up at &Union last night for the exchange of the magical jar of kimchi and ended up having a LOT to talk about.
So without further ado, Kelly – take it away!
– Making kimchi is one of the most satisfying culinary experiences you’ll ever have, I promise! It is easy and delicious and it takes very little time to make enough to last a few weeks or months, but has the same feel as something like gardening, or making marmalade with your grandmother – an old-world tradition or ritual where you just know that the benefits are far greater than the material results – and the best part is that it is really good for you too.
Kimchi is a Korean pickle or condiment made with cabbage as a base. Honestly I do not know much about the real Korean culture behind kimchi. I say that because I have never been to Korea and watched people make and eat it there, so I am no authority on those details. It was first introduced to me by Andrea Potter (a holistic nutritionist and chef ) when I lived in Vancouver in 2010 and the first time I tried it was the batch of homemade kimchi given to me by Kari – a friend of mine from culinary school.
For the uninitiated, kimchi is a delicious spicy pickle with the distinctive “Asian” character that comes from ingredients like chilli, ginger, spring onions and garlic. In the same way that a slice of pickle completes a burger, kimchi completes my noodles, miso soup, rice paper spring rolls, grilled fish, stir fry and anything else that I think needs a bit of life.
Health Benefits
Kimchi is made by natural fermentation in a salty brine, so the vinegary acidity that you taste in the final product is not added, it is actually a by-product of lactic acid fermentation by the same probiotic bacteria that make yoghurt. Fresh kimchi (before fermentation) just tastes like salty, spicy coleslaw and it is left for a few days to allow the bacteria to work their magic.
Apart from being a source of probiotics, the fermentation process also results in higher levels of antioxidants such as vitamin C. There has been a study that showed the addition of fermented kimchi to the daily diet of 100 Korean men was associated with improvements in cholesterol levels, carbohydrate metabolism and weight loss.
The extra fibre from the vegetables and the potential metabolic-boosting effects of the chilli add to the appeal from a health perspective. The role of pickles is also to stimulate saliva production, which, along with the healthy bacteria, aids the digestion of whatever else is eaten with that meal.
The saltiness is the only downside to kimchi, so those with blood pressure concerns should be cautious about how much they eat. There is usually no need to add extra salt to a meal when you are eating kimchi.
Ingredients
Korean kimchi is made with Napa cabbage and daikon (a large white radish), both of which are difficult to find here in South Africa. I use local ingredients where possible, so the result is not traditional (the small red radishes we use are much hotter than daikon), but it is pretty close and it makes more sense to me to use what is available here. I chose to leave out ingredients like dried shrimp and fish sauce, so the version I make is raw, vegan and slightly less pungent than it would be with the shrimp.
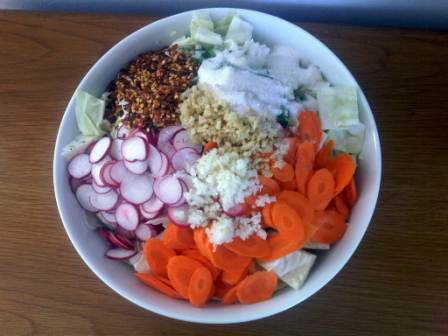
2 kg cabbage – you do not need to weigh this before, just adjust the salt quantity if you have more or less cabbage. Use approximately 1 tablespoon of sea salt per ½ kg cabbage.
1 bunch small red radishes (about 10-12)
6 medium carrots
1 bunch spring onions
1 green apple
3-4 inch piece of ginger
6 medium garlic cloves
¼ – 1/3 chilli flakes
¼ cup good sea salt (or 1 tablespoon per ½ kg cabbage)
Equipment
– Cutting board and knife
– Large bowl and/or ceramic or glass container for mixing and storage. I used a Le Creuset storage container. Do not use metallic containers.
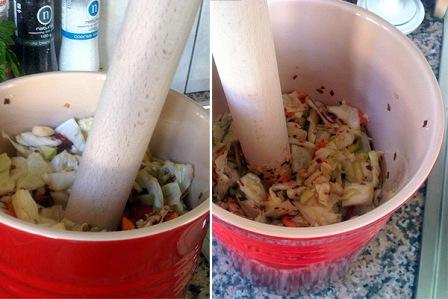
OPTIONAL: Something to help with the initial breakdown of the cabbage in case you get tired of using your hands. I used a wooden rolling pin without handles to help with the “pounding” of the ingredients to draw more water out of them.
OPTIONAL: food processor for making a spice paste. This is traditional, but not essential – you still get a good result if you just finely chop the ginger the garlic.
Items for weighing down the ingredients during fermentation so they are always covered in the brine. I used a plate and a kilogram bag of salt as a weight.
Method
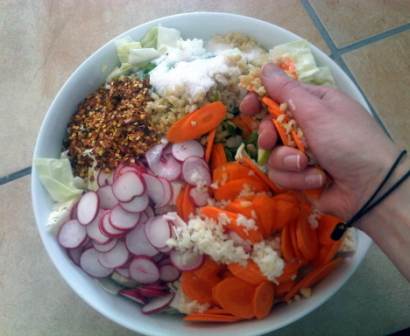
1) Rinse all the vegetables. Chop cabbage into bite-sized pieces, and slice the radishes and carrots. Julienne the apple and slice the spring onions. Put all the prepared vegetables into the large bowl/container.
2) You can either use a food processor to make a paste with the garlic, ginger and chilli first, or you can just finely chop those ingredients and add them to the vegetables.
3) Add the salt and then use your hands to mix all the ingredients together. You have to work at squeezing everything and mixing vigorously for about 5 minutes to get the vegetables to release fluid. I use my hands at first to distribute the ingredients evenly and then I pound them with a wooden rolling pin for a few minutes to help to break them down further.
4) Taste the mixture – it should be pleasantly salty. If it does not taste salty like a pickle, add an extra pinch of salt until it tastes right.
5) When you can see some fluid is released, pack the vegetables neatly and weigh them down. They might not be fully covered at first, but check on them after about an hour or two and you will notice the water level rise as the salt draws more fluid out.
6) Cover the top of the container loosely with a cloth to prevent anything from getting inside, but not with a tight-fitting lid – you want carbon dioxide to escape.
7) Leave the jar on the counter for 2-5 days and taste it every day to see how it changes. You can leave it there for 2 weeks or more if you want a full fermentation and maximum benefits, but the first time you try this you might prefer a fresher taste. If the kimchi goes bad you will know immediately because it will look, smell or taste really terrible, so don’t worry, you will notice! If that happens, just throw it out and try again.
8) Once the kimchi has reached a stage of pickling that you like, you can transfer it to the fridge, either in the same container with a lid, or into closed glass jars, where it will keep for several months.
Kelly Schreuder – Registered Dietician & Private Chef
Combining her dietetics and professional culinary backgrounds, Kelly has a deep understanding of how to use food to enhance health and get the most from your body. She runs her dietetics practice at the Velocity Sports Lab in Hout Bay, Cape Town, and offers private or group cooking demonstrations.
Twitter: @CTdietician
Email: klschreuder@ctdietician.co.za
Phone: 082 321 8463
Prune and almond breakfast cakes
Posted: January 24, 2013 Filed under: Uncategorized | Tags: Baking, Breakfast, Healthy, recipes, seasonal, Summer Leave a commentIf there’s one thing I love about Summer, it’s seasonal fruit. Forget days on the beach. Forget flowing sundresses. Biting into a ripe juicy mango or inhaling the scent of sweet pineapple while someone in the kitchen whips up a cheeky Pina Colada, is one of the most intoxicating pleasures belonging to the warmer months. And with all the stone fruit that’s around at the moment, it’s easy to hop onto the plum/nectarine wagon without batting an eyelid.
Prunes are so underrated though. Do you eat them? I love their honey sweet flavour, backed up by a tartness that gives you a subtle mouth-puckering zap. My best way to eat them is to cut them up (straight out of the fridge) over a big dollop of thick Bulgarian yoghurt with some toasted almonds for a quick breakfast. But since eating-on-the-run doesn’t always work out so well with a bowl of yoghurt in hand… I decided something more ‘portable’ was required. Which is how these prune and almond cakes were born.
Ingredients
1/4 cup almond flour
1/4 cup rice flour
1/4 cup oatbran
1 tsp baking powder
1 tsp bicarbonate of soda
2 tsp cinnamon
2 eggs – beaten
1 Tbs coconut oil – liquid
1/2 large banana – mashed
1 Tbs agave syrup
1 tsp vanilla extract
2 cups fresh prunes – chopped
Method:
Preheat oven to 180°C and grease a muffin tin with a knob of butter.
Combine the dry ingredients in a large bowl.
Mix the eggs, vanilla, coconut oil, agave and banana.
Stir into the dry ingredients until well combined.
Fold in the prunes and spoon into the muffin tin.
Bake for 10 – 15 minutes or until cooked through.
A Spring salad
Posted: September 26, 2012 Filed under: Recipes, Wellness | Tags: Healthy, recipes, salads, Spring 2 CommentsBesides yesterday being the day after a public holiday where everyone in the office displays symptoms of repletion in one form or another, it was also the first day that I felt brave enough to sport the short summer dress to work. Oh yes, it happened! There’s something about wearing anything above the knee for the first time after Winter that makes one feel so exposed! I won’t lie that it actually felt pretty amazing and I cannot wait to spend days in light cotton frocks and pretty sandals, eating summery salads and sipping spritzers.
I’ve been slowly easing my way out of the ‘soup-for-lunch’ routine that’s kept me going throughout the chilly season, but now it’s time that the salad phase kicks in. and fast!
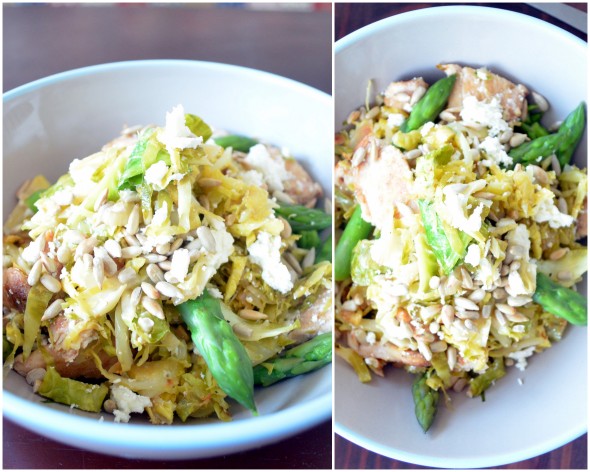
I’ve had a packet of little asparagus tips in the fridge that I’ve been meaning to use (Besides for the smell of Jasmine in the air, I always know Spring is here when I catch a glimpse of asparagus on the shelves at a reasonable price!). It made it’s way into this light Spring salad that’s definitely going to be part of my work-lunch repertoire for the next while. My best though is the brussels sprouts and toasted sunflower seeds that lend a super crunchy texture. Add a chicken breast or two for protein and you’re good to go!
Spring salad
450g brussels sprouts – shredded
1 onion – finely chopped
45ml red wine vinegar
salt and pepper to taste
2 chicken breasts
zest of 1 lemon
1/4 cup sunflower seeds – lightly toasted
1 generous handful goat’s cheese
Method:
Blanch the asparagus tips in salted boiling water for 2- 3 minutes and refresh under ice cold water. Set aside.
In a non-stick frying pan, sauté the onion on medium-high heat until it gets sweet and ‘charry’, then add the brussels sprouts and cook, tossing often. Add the red wine vinegar and let it reduce. Season with salt and pepper. Once the brussels sprouts are cooked and have developed some colour, remove from the heat and set aside.
Cut the chicken breasts into small slices and cook in the same pan. Set aside to cool.
In the meantime add the lemon zest to the brussels sprouts and a light drizzle of olive oil to coat. Once all ingredients are cooled, add the chicken pieces and asparagus and then crumble in the goat’s cheese. Top with the toasted sunflower seeds and an extra grinding of black pepper.
A Summer Dress(ing)…
Posted: January 16, 2012 Filed under: Recipes, Wellness | Tags: Almonds, chickpeas, Dressings, Healthy, recipes, Summer 10 CommentsHello and welcome to 2012! So, what are we? …16 days in?
A new year, a new start, a new outlook…blah, blah, blah. Nothing we haven’t seen before. After all it happens every 365 days. Just like your birthday! The only change happens with us. Looking back at 2011, I find it hard to grasp how much I learnt about myself. About my world, THE world and where/how I fit into it. I met the most amazing and inspiring people along the way and feel so lucky to have been able to share some of their stories. The learning is not over though and 2012 is merely a treasure box just waiting to be unearthed, filled with wonderful new experiences and challenges.
For some, it’s the anticipation of a wedding, or the arrival of a first child (I can’t keep up with the number of friends I have who are pregnant! Eish). For others, it’s simply moving to another city or starting a new job. With all the chaos that comes along with it all, we sometimes lose track of “now” and just being in the moment. As one of my yoga instructors last year explained (and I totally understand what she means because it happens to me a lot), is that our brain likes to play tricks on us by thinking too far ahead into the future or forever holding onto the past. But the present is all that we have, this moment that you’ve been given right now. The future is not real. It’s in our imagination. Of course we can dream but be present, be now and live for today!

…Good. Now that that’s out the way, can we please talk about food?!
What is January without a little kicks-tart of healthy eating? Thankfully down here in the Southern hemisphere we find ourselves smack bang in the dreaded heat of summer which makes it the perfect time to fill up on light, refreshing foods that are packed with flavour but low in calories. There’s nothing like biting into a big chunk of juicy pink watermelon or inhaling the sweet tropical fragrance of a mango.
Salads are one of my favourite things to eat during summer…actually, make that all year round! I love playing with texture and colour and enjoy anything with a good “crunch” like chopped up Israeli cucumber, water chestnuts or some toasted nuts and croutons. But what is a salad without a dressing? Call me boring but I’m a total sucker for a simple Balsamic and olive oil vinaigrette, although sometimes I allow myself to be swayed by something a little more interesting.
I developed this dressing last year and literally made it almost every second day because I just couldn’t get enough of it! You could see it as a sort of mixture of hummus (which I love), pesto and vinaigrette all whipped up into one. Sounds a bit odd, I know…but keep reading. You’ll thank me later!
I know I said this was a dressing but you could actually adjust the consistency somewhat by reducing the amount of liquid and use it on sandwiches, grilled chicken or fish, as a dip for chips, or even as a topping on a warm baked potato! There are no limitations on this one so go wild and try it on/with whatever your heart desires! Aaaand, it contains all the healthy high-protein goodness that your body needs 🙂
What you’ll Need
1x can chickpeas, drained
100g raw almonds
½ cup olive oil
1/3 cup water
1 tsp garlic, creamed
¾ tsp cumin
11/2 Tbsp red wine vinegar
2 Tbsp lemon juice
150g coriander (or whatever herb you like)
What to do
Place all ingredients into a blender or food processor and blend until smooth and creamy.
Adjust consistency and seasoning to your liking.
Store in an airtight container in the fridge. Lasts 3- 5 days
Pumpkin Pecan Loaf
Posted: September 26, 2011 Filed under: Recipes, Wellness | Tags: Baking, Cake, Dairy-Free, gluten-free, Healthy, Pecan Nuts, Pumpkin 1 CommentI decided to share this recipe with you because it turned out so well and I know I will definitely make it again sometime. I made it for my Wellness Warehouse Post last week and I’ve been nibbling on it NON STOP !!
It has a slight banana bread flavour, which I find quite strange- as there’s not even the smallest ounce of banana in it?! Weird.
Anyway, try this! (Oh, and for those that care… it’s both gluten and dairy-free. Yip)
What you will need:
1 cup cooked, pureed pumpkin
½ cup oil
2 eggs beaten
2/3 cup sugar
1 1/2 cups brown rice flour
1 tsp bicarbonate of soda
½ tsp salt
1 tsp cinnamon
¼ tsp gluten-free baking powder
2/3 cup pecan nuts, roughly chopped
What to do:
Preheat your oven to 180 Degrees C. Grease a standard size loaf tin and set aside. Mix together the eggs, oil, pumpkin and sugar. Combine the brown rice flour, bicarbonate of soda, baking powder, cinnamon and salt. Fold the dry ingredients into the pumpkin mixture and add the nuts. Stir until you form a thick batter. Pour the batter into the loaf tin and bake in the oven for 40-45mins.
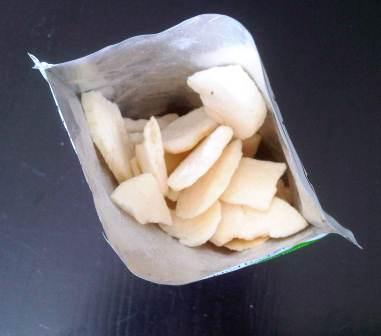
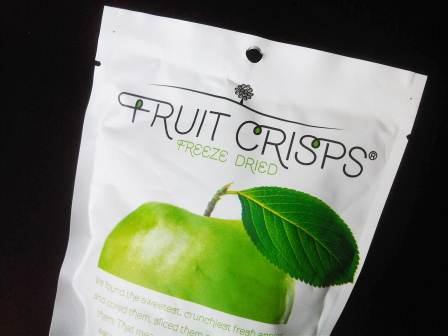
Freeze-Dried Apple Crisps
Posted: September 9, 2011 Filed under: Wellness | Tags: Apple Crisps, Fruit, Healthy, Snacks, Wellness Warehouse Leave a commentThese are amazing!!!
Head on over to Wellness Warehouse and find out what I think of them!


